Sensors and Remotes
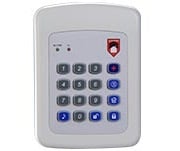
AlarmForce Keypad
Select another panelChanging a sensor battery
Changing the batteries
Select your device
DXS-80
Battery type: one CR-123A battery
- To access the battery compartment, turn the unit counterclockwise to release it from the ceiling mounting plate and then pull the detector towards you.
- Remove the old battery and wait 30 seconds.
- Install the new battery.
- If applicable, close the battery cover or attach the sensor to ceiling mounting plate, turning the unit clockwise to lock it into place.
Call technical support at 1 877 267-2004 to confirm the battery replacement was successful and the device is in proper working order.
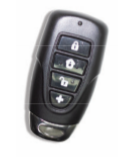
Battery type: one CR-2032 battery
- Use a small Phillips screwdriver to open the back cover.
- Not the battery orientation (+/-).
- Slide out the existing battery.
- Install the new battery, maintaining the same orientation.
- Put the case back and secure it with screws.
Call technical support at 1 877 267-2004 to confirm the battery replacement was successful and the device is in proper working order.
C54P model
Battery type: one 9V battery
- Remove the screw and open the case.
- Replace the battery with a fresh 9-volt alkaline or lithium battery, positive (+) side up.
- Snap the detector into the base and replace the case screw when finished.
Call technical support at 1 877 267-2004 to confirm the battery replacement was successful and the device is in proper working order.
DXS-55AF

Battery type: one CR-123A battery
- Squeeze the top and bottom of the case to open it.
- Remove the old battery, noting its orientation.
- Insert a new battery.
- Close the case.
Call technical support at 1 877 267-2004 to confirm the battery replacement was successful and the device is in proper working order.
DXS model
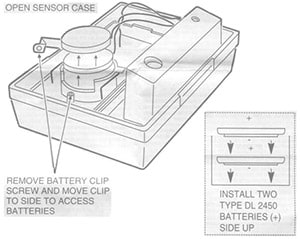
Battery type: two CR-2450 batteries
- Open the sensor by inserting a small flathead screwdriver into the groove on the bottom sensor.
- Gently twist the screwdriver to pry apart the two halves of the sensor.
- You’ll need to remove a small retaining screw and clamp; be careful not to lose them.
- Remove the old batteries by pulling them straight out from the sensor.
- Install the new batteries, ensuring the positive (+) side is facing up.
- Put back any screws or clamps you’ve removed and place the cover back on the sensor.
Call technical support at 1 877 267-2004 to confirm the battery replacement was successful and the device is in proper working order.
Flood detector
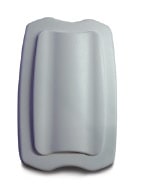
Battery type: four AAA batteries
- Remove the two front-facing screws from the rear of the sensor with a Phillips screwdriver to separate the two halves of the sensor.
- Remove the old batteries and install the new ones.
- Reattach the two halves of the sensor, and reinstall the screws.
Call technical support at 1 877 267-2004 to confirm the battery replacement was successful and the device is in proper working order.
DXS-31AF
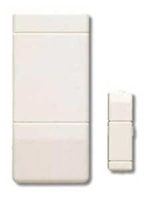
Battery type: two CR-2450 batteries
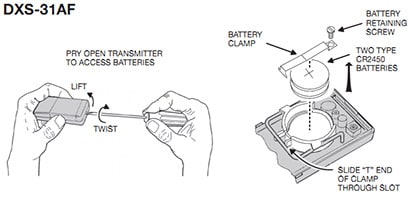
- Open the sensor by inserting a small flathead screwdriver into the groove on the bottom sensor.
- Gently twist the screwdriver to pry apart the two halves of the sensor.
- You’ll need to remove a small retaining screw and clamp; be careful not to lose them.
- Remove the old batteries by pulling them straight out from the sensor.
- Install the new batteries, ensuring the positive (+) side is facing up.
- Put back any screws or clamps you’ve removed and place the cover on the sensor.
Call technical support at 1 877 267-2004 to confirm the battery replacement was successful and the device is in proper working order.
DXS-36AF
Battery type: one CR-2450 battery
- Open the sensor by inserting a small flathead screwdriver into the groove on the bottom sensor.
- Gently twist the screwdriver to pry apart the two halves of the sensor.
- Remove the old battery by sliding it to the left and out of the sensor.
- Install the new battery, ensuring the positive (+) side is facing up. Slide the battery back in the sensor.
- Place the cover on the sensor.
Call technical support at 1 877 267-2004 to confirm the battery replacement was successful and the device is in proper working order.
DXS-73
Battery type: one to four CR-123A batteries
- To remove the detector from its mounting base, twist the detector counterclockwise and pull it away from the base.
- There may be a cover over the batteries; if so, open the cover to access the batteries.
- Remove the old batteries and wait 30 seconds.
- Install the new batteries.
- Reinstall the detector on its mounting base, and turn the detector clockwise to lock it into place.
Call technical support at 1 877 267-2004 to confirm the battery replacement was successful and the device is in proper working order.
Low temp sensor with FX-31P
Heat rise sensor with FX-31P
Battery type: two CR2450 batteries
- Open the sensor by inserting a small flathead screwdriver into the groove on the bottom sensor.
- Gently twist the screwdriver to pry apart the two halves of the sensor.
- Depending on the sensor, you may need to remove a small retaining screw and clamp; be careful not to lose them.
- Remove the old batteries by either pulling them straight out or sliding them to the left.
- Install the new batteries, ensuring the positive (+) side is facing up. If sliding the battery into the sensor, slide it in from the left.
- Put back any screws or clamps you’ve removed and place the cover on the sensor.
Call technical support at 1 877 267-2004 to confirm the battery replacement was successful and the device is in proper working order.
-
Business phone support
Small business services
- Bell Total Connect Support
-
Business Internet support
Small business services
Small business support
-
Business TV support
Small business services
Small business support
-
Security and Automation
Small business services
Small business support
-
Business Mobile support
Small business services
Small business support
-
Web & collaboration support
Small business services
Small business support
-
Billing & Self serve support
Small business services
Small business support
- Contact us
- Find a store
- About Bell
- Language and region
- Business Self serve
- Starting a business
- BellMedia.ca
- Site map
- Get email updates
- Moving a business
- Jobs@Bell
